A Guide to Producing Video for Social Media: Guest Blog with Kayla Avitable:
May 30, 2025
You don’t always need a full production team—great social media video content can start with a simple idea and smart execution with our social media video tips.
If you’re creating your own videos for social media content, it can feel overwhelming to know where to start. But with a few simple strategies, you can produce eye-catching, engaging videos that truly connect with your audience.
In this guest blog, Kayla Avitable, editor with Main Paige Media, shares her expert social media video tips for creating standout video content—no crew required. This guide covers everything you need to create scroll-stopping videos—from platform-specific formatting and filming techniques to content ideas and editing best practices that work across platforms.
Read Kayla’s blog “A Quick Guide to Navigate Creating Video for Socials” below for her helpful tips!
Overview
There are several factors to consider when investing time and oftentimes money into creating social media video content for social media. This guide will go over many important details such as preferred formatting for specific platforms, filming tips/techniques, suggestions for creating engaging content (with examples), and editing and posting best practices.
Formats
These are the three most common formats you will find in video for social media and their pixel dimensions:
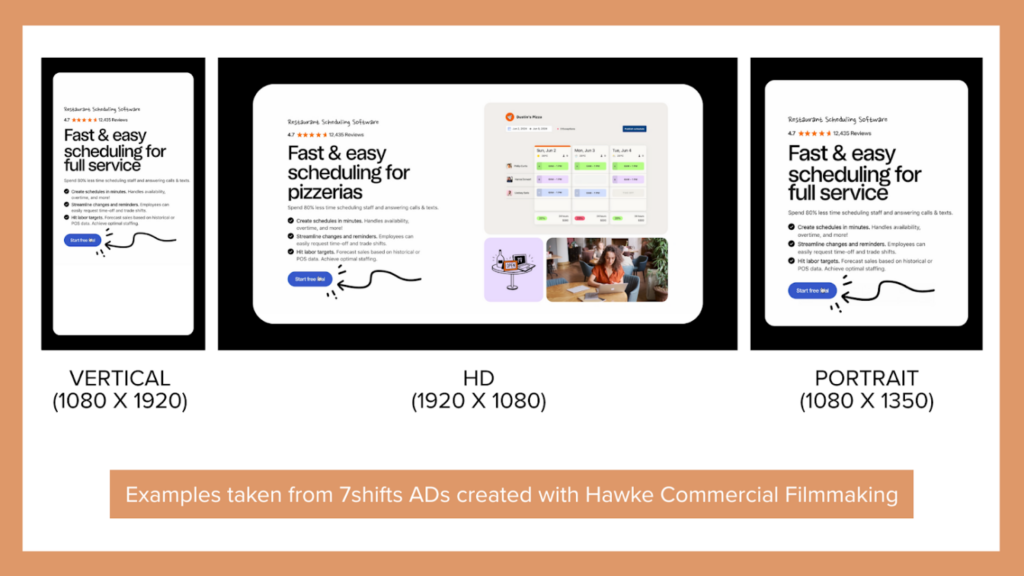
Each social media platform has a preferred video format with some give and take. Here is a quick breakdown by platform:
- TikTok: Vertical (1080 x 1920)
- Instagram: Vertical (1080 x 1920) for Instagram Reels, Story ADs; Portrait (1080 X 1350) for In-Feed ADs; HD (1920 x 1080) for posts –however– Vertical and Portrait generally perform better on Instagram
- Facebook: Vertical (1080 x 1920) for Video, Story ADs; Portrait (1080 X 1350) for In-Feed ADs; HD (1920 x 1080) is accepted but often videos in this format are uploaded to YouTube and linked out
- Twitter/X: Vertical (1080 x 1920) is more common; HD (1920 x 1080) is also accepted but not as preferred
- Linked-In: Vertical (1080 x 1920) – Linked-In has embraced vertical video more recently; HD (1920 x 1080) – the traditional HD format is also widely seen on the platform since it allows videos up to 5 minutes in length to be uploaded directly
- YouTube: HD (1920 x 1080) – YouTube is primarily for longer form content (2 min+) and therefore fits the more traditional format; Vertical (1080 x 1920) – the YouTube Shorts tab is designed specifically for posting short-form Vertical content
What if I want to create content that resides on multiple platforms with multiple formats?
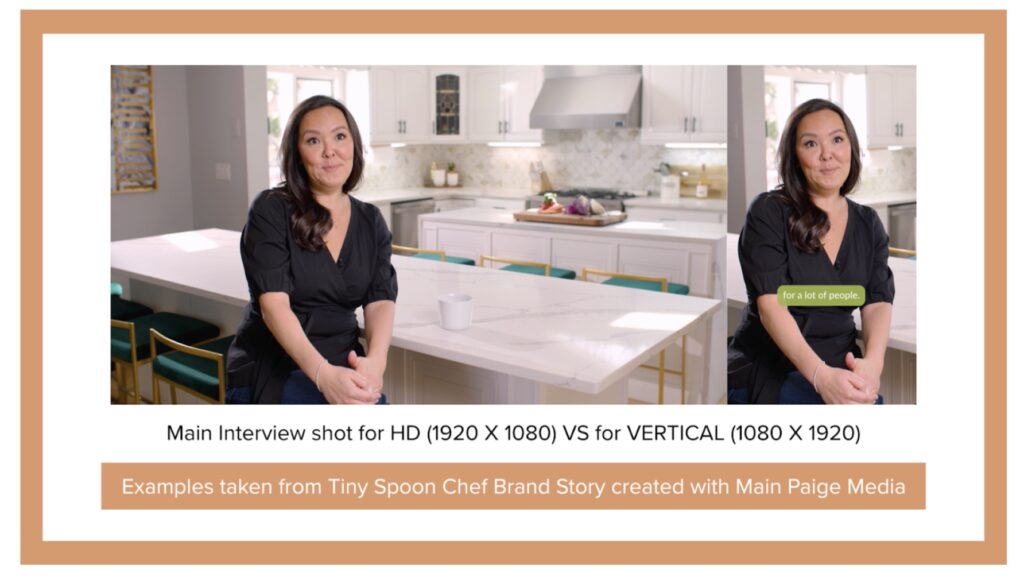
If you, for example, want to create a longer form demo for YouTube in HD format, but want to cut out three, 30 second clips for TikTok and Instagram Reels, shoot for the HD format and then reformat in your editing software to Vertical. See the next section for filming tips to ensure your HD video footage crops well to Vertical.
Filming Tips & Techniques
Settings: Experts typically recommend shooting your video in 4K (3840 x 2160) resolution, since its higher pixel density helps preserve image quality when you scale up. Notice that the pixel dimensions are twice that of HD (1920×1080).
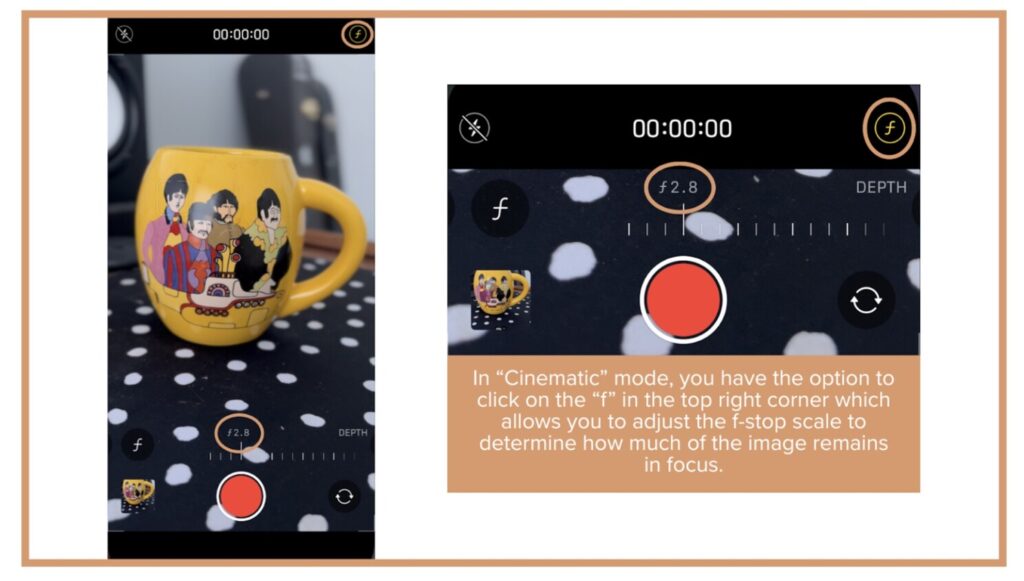
F-stop: To create that blurred background, lower the f-stop setting on your phone or camera to a lower number (3 or under).
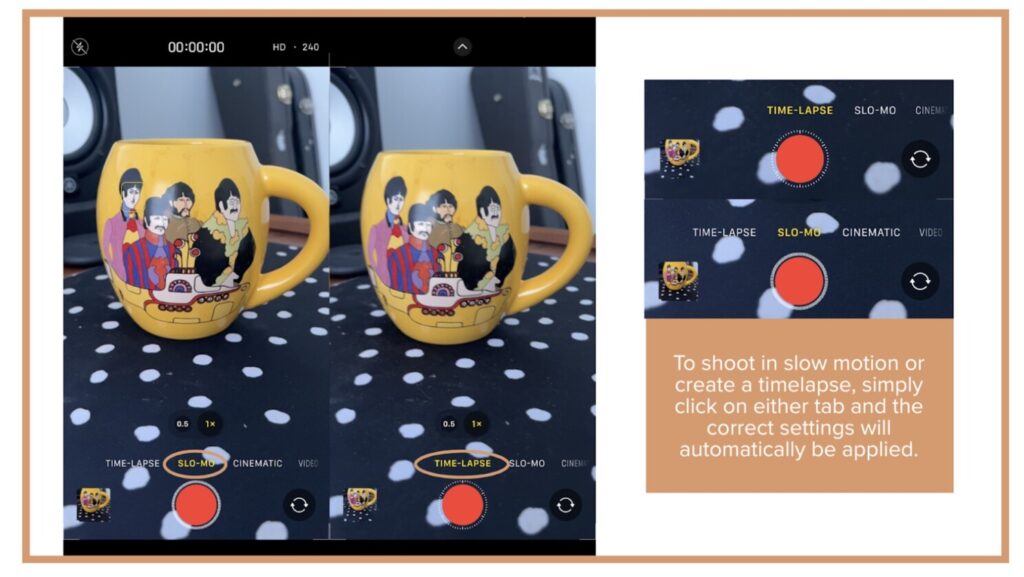
Slow motion and time lapse: Most iphones have the ability to film in slow or fast motion.
Helpful Apps for Filming on Your Phone: Blackmagic Cam, Filmic Pro
Create a scene: While not always necessary, many creators recommend following a specific flow when establishing a space.
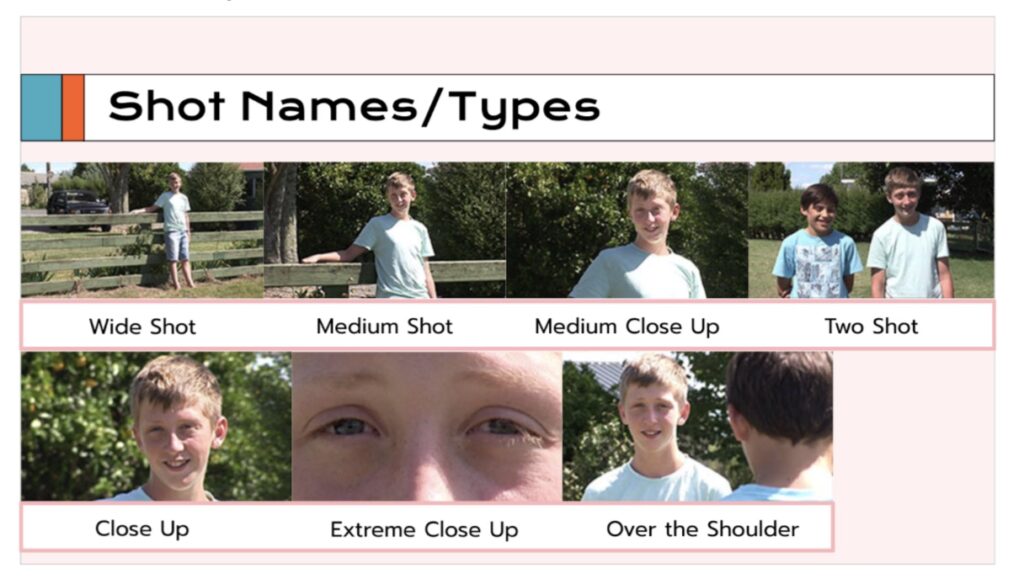
Start with a medium-wide or wide shot, otherwise known as an establishing shot to orient the viewer (this can be an exterior of a building, a shot of two people during an interview).
After that, move into detail shots such as close-ups, medium close-ups, etc. See the chart below for visual definitions of “close-up,” “medium shot,” etc.
Lighting: The lighting source, whether natural or artificial should be behind the camera or phone in order to avoid harsh silhouetting. For example, this happens when you put a subject in front of a very bright window without some other light to compensate.

Opt for diffused light such as a ring light, a light with a soft box over it or indirect natural lighting. To further elaborate on “indirect” natural lighting:
When shooting with natural light, it is often best to avoid shooting at the sunniest times of day (for example, noon) because the light is too harsh, and the 90° overhead angle creates unflattering shadows. Opt for morning and afternoon (you may have heard of the term golden hour ~3pm).
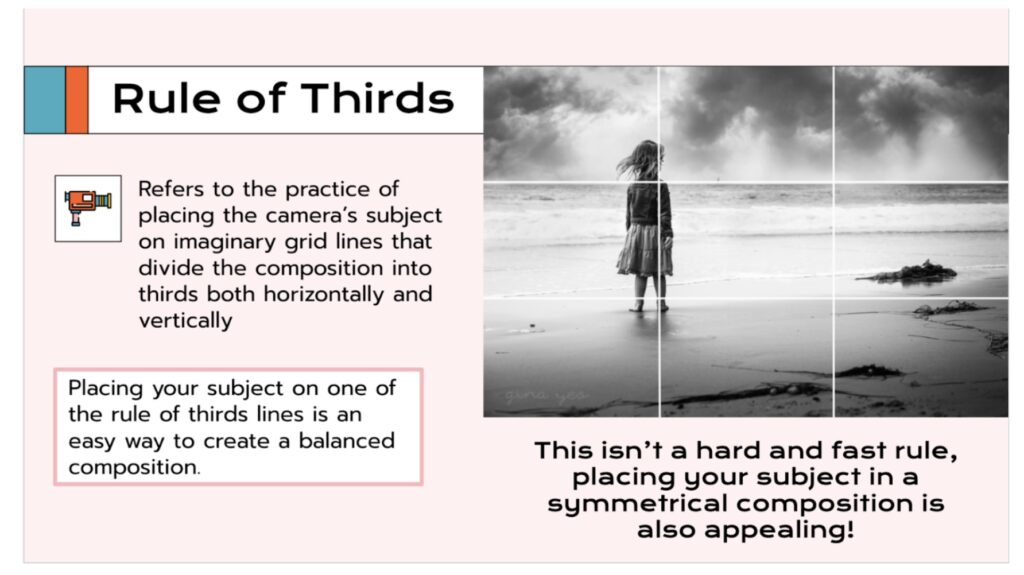
Framing: Use the Rule of Thirds as a guideline. This is more applicable to HD format but overall useful in creating interesting imagery.
If shooting Horizontal in order to create video for both HD and Vertical formats, you MUST shoot 4k. You must also frame everything wider in order to accommodate for cropping.
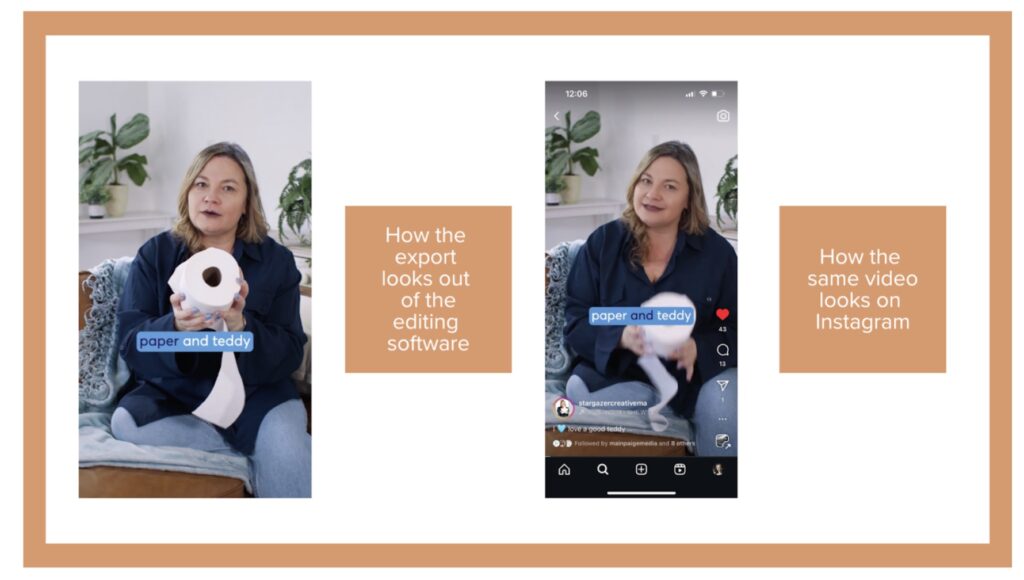
If shooting Vertical, make sure to leave ample headroom and space on the sides of the frame. Platforms like Instagram will often cut crop the images to fit the interface.
Content Ideas
“Fun Facts”: Starting with a hook through the Voice Over/Script or visually through the video. Both are a great way to stop the scroll. Say things like “Did you know ….?” “Not many people know this, but ….” “You’ve been doing …. wrong.”
Here is an example of a reel that uses both an auditory and visual hook: https://www.instagram.com/reel/DGDfaDMMR97/?igsh=cmQ2OHpxMnM5cTRi
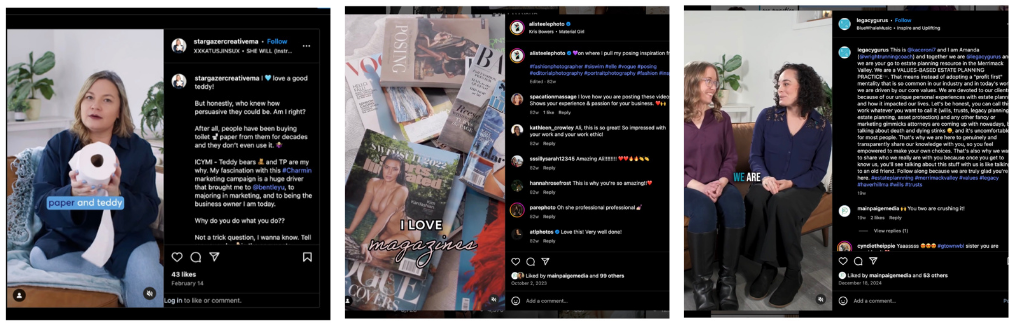
Product Demos/Your Process: People like to get the behind the scenes of what you’re doing or why you’re doing it. Here is an example of a reel where a photographer goes over how they get inspiration for posing models: https://www.instagram.com/reel/Cx6o7rNrYRP/
The People Behind the Business: Content with PEOPLE performs very well. Have employees talk straight to camera about their position, why they love working there/what they do, etc. Here is an example of a reel introducing two employees at an Estate Planning firm. You’ll see why they do what they do: https://www.instagram.com/reel/DDtUqs0xEXm/
Editing and Posting Best Practices
Many of these apps have the ability to edit in-app, however it can be clunky. Here are some free editing softwares. iMovie is included on Mac computers. CapCut is a very widely used free editing software.
Jump cuts are allowed and encouraged, B-Roll is a bonus, Transitions grab attention. People’s attention spans are lacking. Punching in on the interview shots or using B-Roll (or outside imagery such as the magazine shots in the Posing Reel) are a great way to keep the viewer engaged. Not to mention, a transition, whether in-camera or in post, shows up in every other reel on your feed.
Captions are necessary. Many people don’t scroll with sound on, so having captions is essential to get your message across. Get creative with captions. Capitalize, bold, or style key phrases to highlight your most important messages, just like the reels featured above.
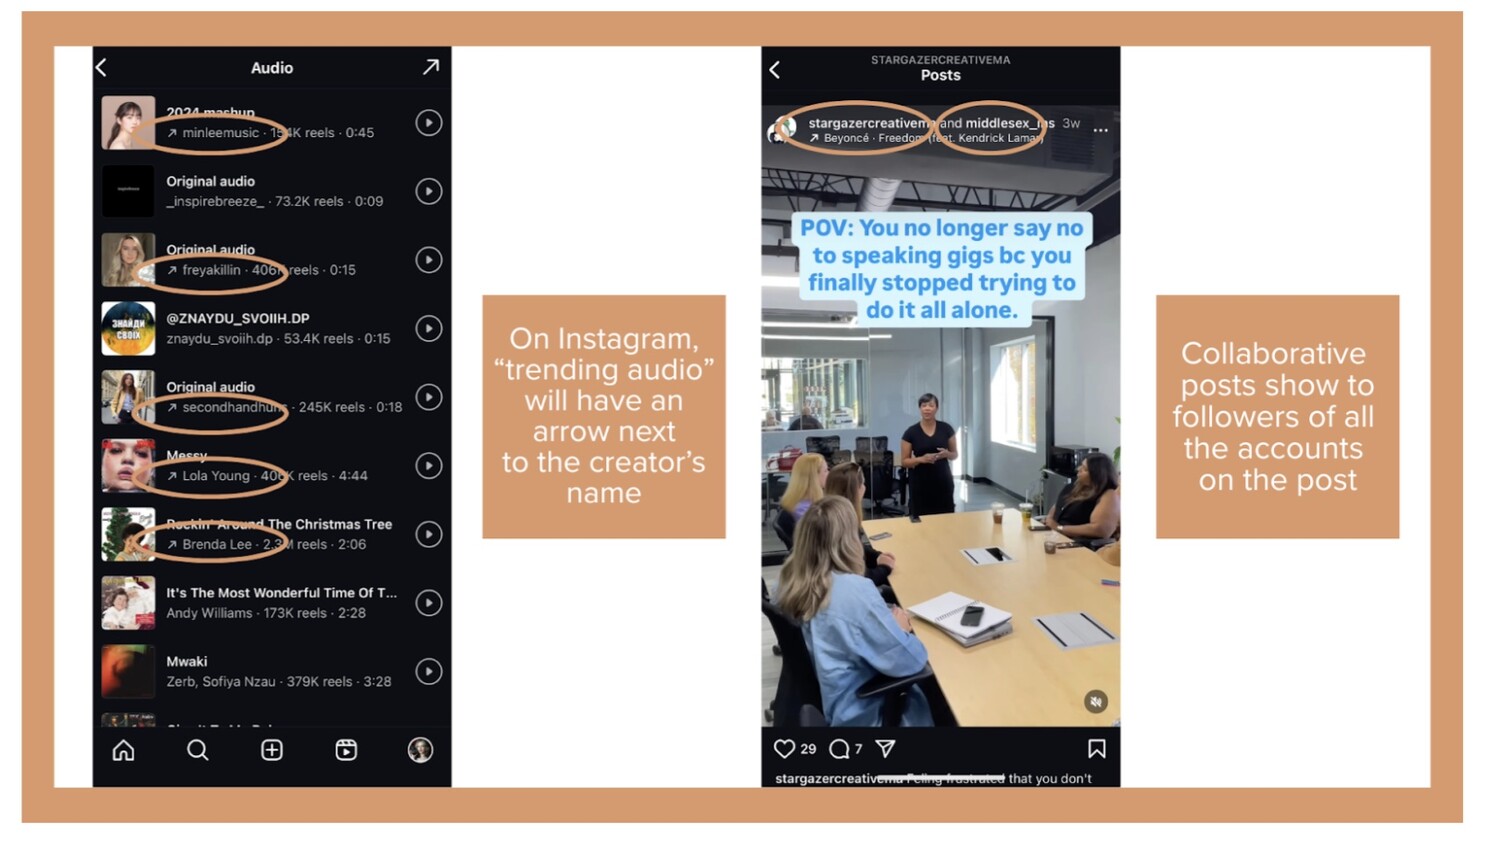
Using “trending audio”. Cut your footage to music to boost engagement, but use trending audio to better align with the platform’s algorithm.
Hashtags – Be intentional … what hashtags are other businesses in your field using?
Tag your collaborators, or if on Instagram, do a collaborative post to reach a new audience.
Was This Information Helpful?
We hope you enjoyed this guide Kayla put together for creating videos for social media. Reach out to Main Paige Media if you’d like to do a strategy session with us for your DIY content.
